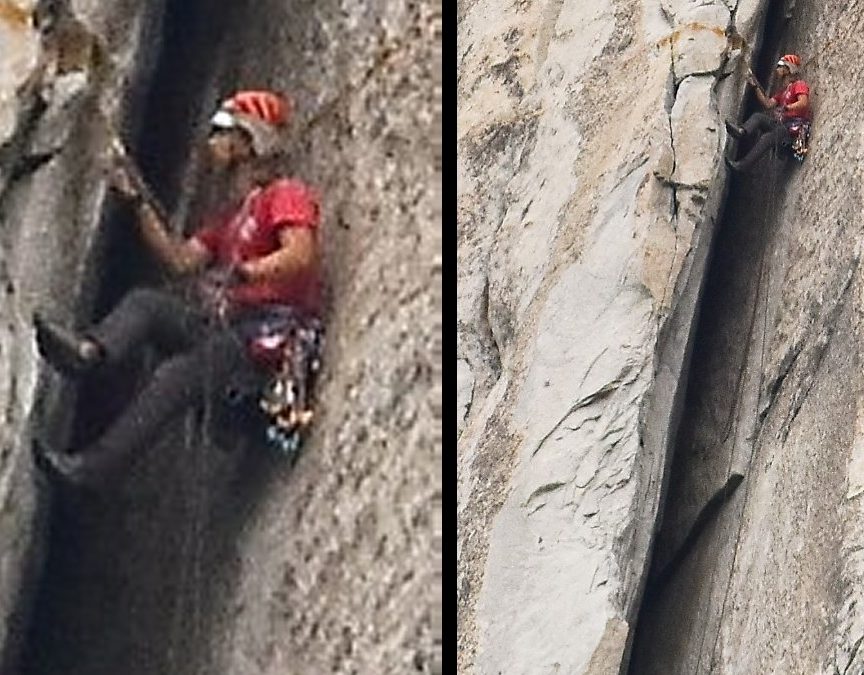
Picture for the article by Tom Evans (THANK YOU!!): Yann Camus flashing the Salathe Wall (super runout here) on El Capitan lead rope solo over 5 days.
There was just a post in the Lead Rope Solo (LRS) Facebook group: “Can you give me tricks for LRS multi-pitches, I would love tips and tricks for being as efficient as possible!”.
Here is my article to answer this question. NOTE: Rock climbing is dangerous. LRS climbing more so. Have a contingency plan (someone to come to rescue you at some point). Take your time to learn stuff. Don’t do too much too soon. Learn the SOLO home safe solo buddy check system and use it. (VIDEO HERE – Also check the description of the video for an update on the subject) Also: bring a well-charged cell phone with you that you can access while suspended (not in a too-tight pant pocket) and leached so you cannot drop it. When thing are fine, you can manage but in case of emergency, all things can go wrong! Read this Accident Report. I love the AVANT SNACK PACK for this! Finally, buy my TRS+LRS online course and study it well! (COURSE HERE)
GET 25% OFF – FLASH SALE APRIL 2025: CLICK HERE FOR DETAILS!
The first thing would be that practice makes perfect. Start with 2 pitches, then 4, then 8, etc. With each climb, see what works and what hurts and find solutions to make things more efficient.
For sure not using the rope will be the fastest but I urge you to use the rope: it is not worth risking it all to gain a few minutes. There are some ways to make it more efficient and still be fast. You should find many usefull tricks in this article to help as it took me many years to gather them all.
1. Study Your Route and Plan Accordingly
How much time will you be on the route? How much water and food do you need? Note: I drink 4L per day climbing a big wall with a partner. I drink 6L per day climbing a big wall solo. Will there be traverses? Would they be easier to “climb 3 times” or “lead-rappel-second TRS”? What is the optimal rope length? Do I need a second rope to get down the mountain? When solo: I try to climb with only one rope as I have to carry it all by myself. 4kg makes a big difference overall. I sometimes bring the Beal Escaper to make 60m rappels with a single rope. Saving me a lot of weight. (DANGER: don’t get your Escaper stuck and you need to re-ascend the rope not knowing if safely tied up there) Second best is bring a 60m pull cord (typically Nylon 4mm) to retreive a blocked rappel (DANGER: don’t get yourself stranded with only a 4mm cord in your hands!). That way I stay a shorter time on the route and I can carry less water.
2. Do Your Pitches as Long as Possible
When LRSing, there is no rope drag like with partnered climbing. The rope does not run through the quickdraws: it is static. With a partner: the end of the pitch is the hardest as you get drag and rope weight. LRS, the end of the pitch is the easiest as you have less rope weight and rope to manage. Simply use the methods to suspend the lead-rope weight wisely (VIDEO HERE) Make sure you link the pitches you can link. Use intermediate belay anchors if it makes sense (if you can do 3 pitches in 2 for example). Don’t skip bolted belay stations just because you want to make the longest pitches every time on trad routes: if you do that continuously, you will spend too much gear in trad belay stations.
3. Lead Your Pitches
Go as light as possible. Leave at the bottom belay anchor all you can: the small pack, all the water, the food, the ascenders and etriers (gear to second), unneeded rack-for-the-pitch, rappel rope (if you can), approach shoes, etc. Dress for performance and do your best at flashing / redpointing / french freeing your pitch (whatever style you choose). You will feel the urge to get business done as water and food will only be available after you rappel back to the bottom belay anchor! Random trick: use climbing shoes comfortable enough so you can run with them. And try to keep them on the whole time you are on the multi-pitch. That will be less comfortable but with an increased efficiency. Check how I prepare my feet for the Nose in a Day: VIDEO HERE.
Also: manage your rope well during the climb. If you can, use ledges to stack your rope. Not rope bags (if possible). If there is a ledge per pitch (at the belay anchor or elsewhere), you can probably leave the ropebag(s) at home and use those ledges to stack your lead rope. IF there are more than one ledge for some pitches: consider re-stacking the lead rope mid-pitch. It will make you so much lighter to lead away! Consider unweight the Live Rope at that moment so you feel the best!! Use rope bags if ledges are few to stack the lead rope. Only use the “rope in a backpack” method if winds are so strong they might blow your lead rope stuck somewhere you could not reach safely to self rescue or if your climb is full of features to get your rope stuck.
4. Warning – During the Rappel Parts
Make sure you remove all the places you Unweighted the Live Rope. Don’t ascend a rope or TRS on a single lead anchor point with some dangerous slack if that point fails!!! (DANGER – It happened to someone in the LRS FB group…)
5. Second Your Pitches
Rope soloing a multi-pitch it tough because you cover the ground 3 times. On lead, on rappel, on seconding. If the multipitch climb you choose is a challenging solo for you, you need to spare your climbing muscle for the Lead parts. Therefore, you should second your pitches with ascenders if they are any challenge at all. I can lead 10d LRS in general and 11 LRS sometimes. But I will second 5.8 ground on ascenders to spare climbing muscles for Leads. 5.6 I will TRS (I just pull my ascenders up behind me) because it is less tiring than ascending for me. My advice is: get VERY efficient seconding pitches with 2 lanyards, 2 etriers and 2 ascenders. I would consider LRS-Rappel-TRS only VERY mellow climbs for my level in the 5.7 and under range.
6. Don’t Bring Anything Back Down if You Don’t Have to
LRS a multi-pitch is basically LRS-Rappel-Second the Pitch, repeat until you reach the top. When you finish the LRS part: leave all you can at the top belay anchor (the remainder of the rack, the Silent Partner, etc). When you are in the Rappel part, leave the gear you placed along the pitch where it is (or get it down a little bit only if more convenient). Clean as little as possible on the way down, clean on the way up!!
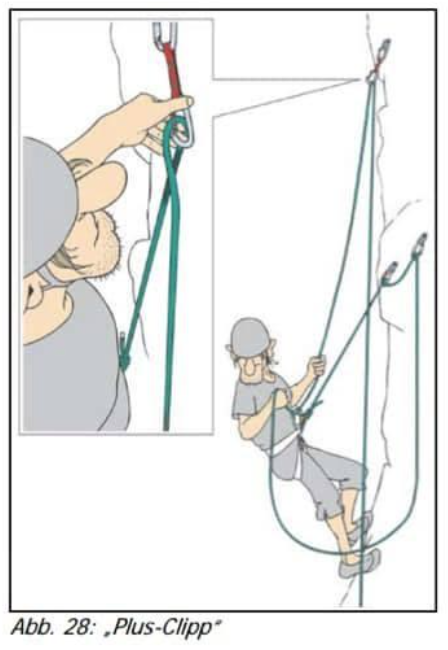
7. Do NOT do a Factor 2 Fall (The Pluss Clip)
Just once in my life, I did a Factor 2 Fall. Lead Rope Solo. I anchored the rope to 2 bolts, started leading the pitch, fncked my footworks in a delicate free climbing move. There was no way to protect it from the belay. I fell right on the anchor. I was using either the Silent Partner (probably) or the Soloist (maybe). The jerk was not fun. I was young. I re-composed and sent the pitch. Don’t do it. There is a way to protect this from happening. It is called the Pluss Clip: when you LRS the previous pitch: continue with the start of this pitch up 1 or 2 or 3 protections and come back down to the belay anchor. Pass the rope so you are ready to LRS that pitch with the lead anchors already clipped!! I never do it. But I keep that trick up my sleeve for one day maybe! The down side to this is you will have to cover this part of the climb 5 times… Loosing a bit of efficiency but gaining some margin of safety! Good to have. Study the picture below (Reference for the picture here Thanks Chigozie Nri for finding it for me!):
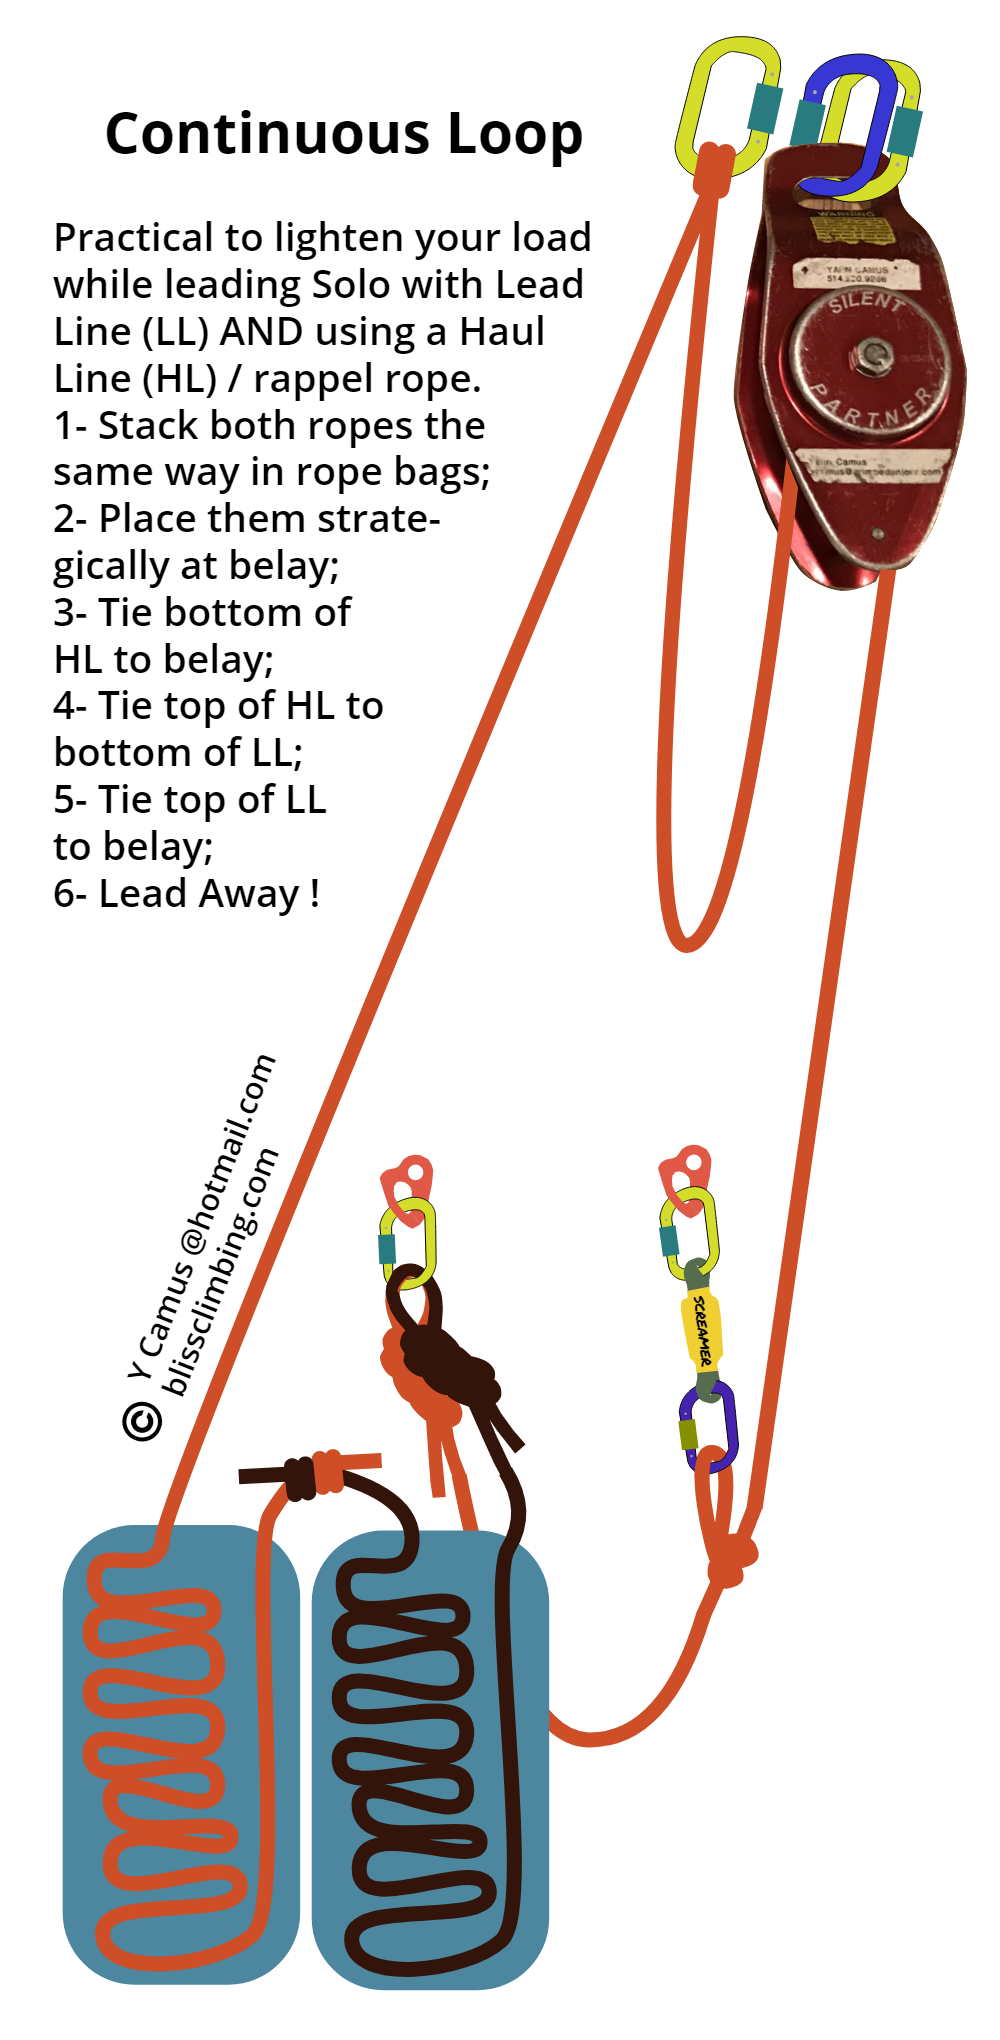
8. Use the Continuous Loop on Big Walls
The continuous loop method makes it possible to Lead with ONLY the lead rope but still get the Haul rope when you top your pitch!!! Study the picture below (click on it to enlarge):